Working with Units: A Step-by-Step Guide
On the Units page, you can create and customize the structure of your course by adding units and lessons to make sure your course is logical and consistent. This step-by-step guide will help you understand the functions of the page so you can create and edit units, add goals and objectives, and manage course content.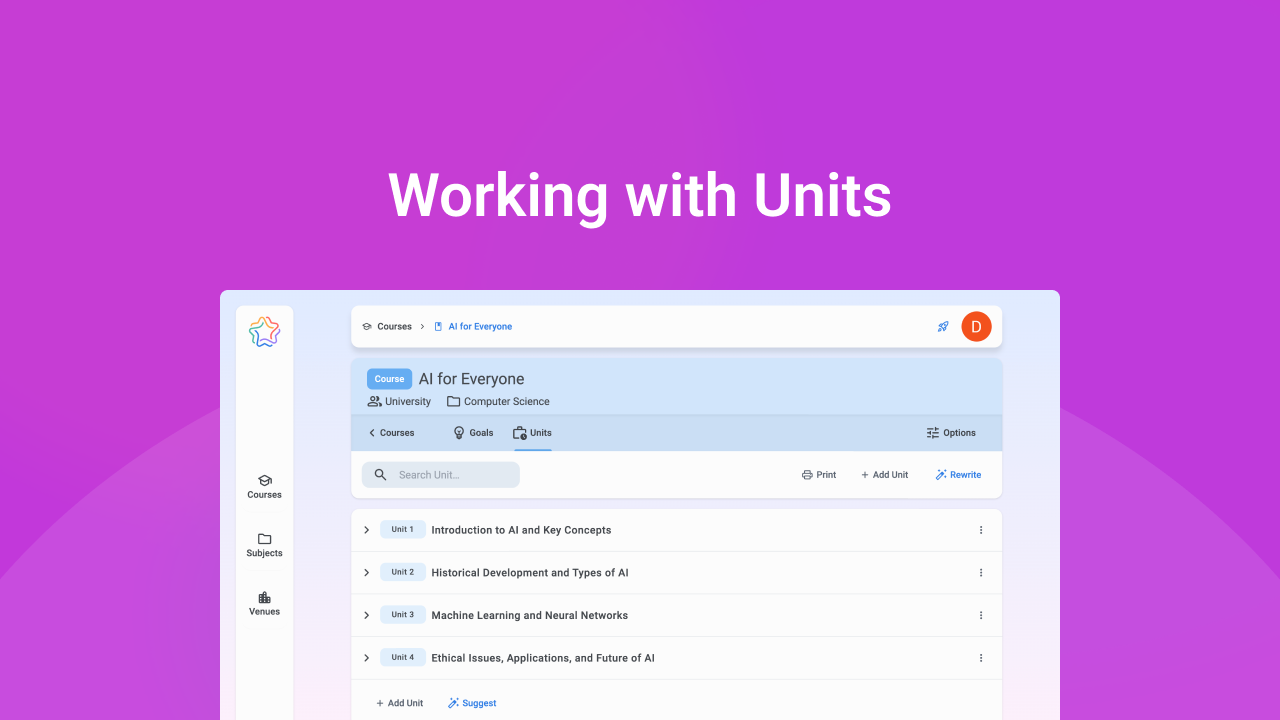
Step 1: Choose how to create a Unit
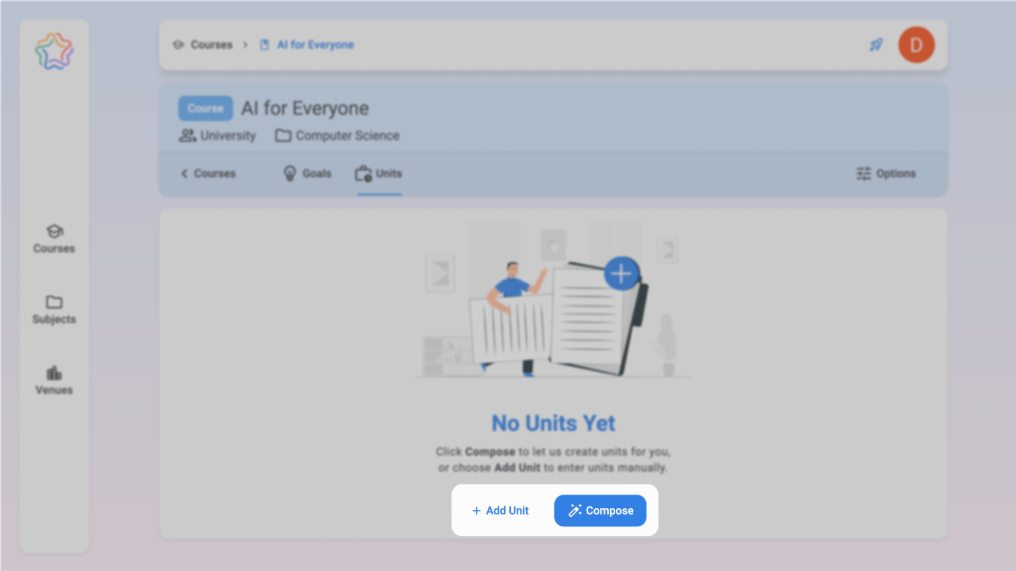
At the start of the Units page, you will see two main buttons for creating a unit: “Add Unit" and "Compose”. The “Add Unit” button allows to manually create a unit from scratch. In contrast, the "Compose" button uses artificial intelligence to quickly create a unit based on course goals and objectives.
Compose Course Plan
Click the "Compose" button to use AI to automatically generate units.
A settings window will appear where you can set:
- Number of units (default is 5, but you can change the number).
- Number of lessons in each unit (default is 5 lessons, but this value can also be changed).
❗ Keep in mind
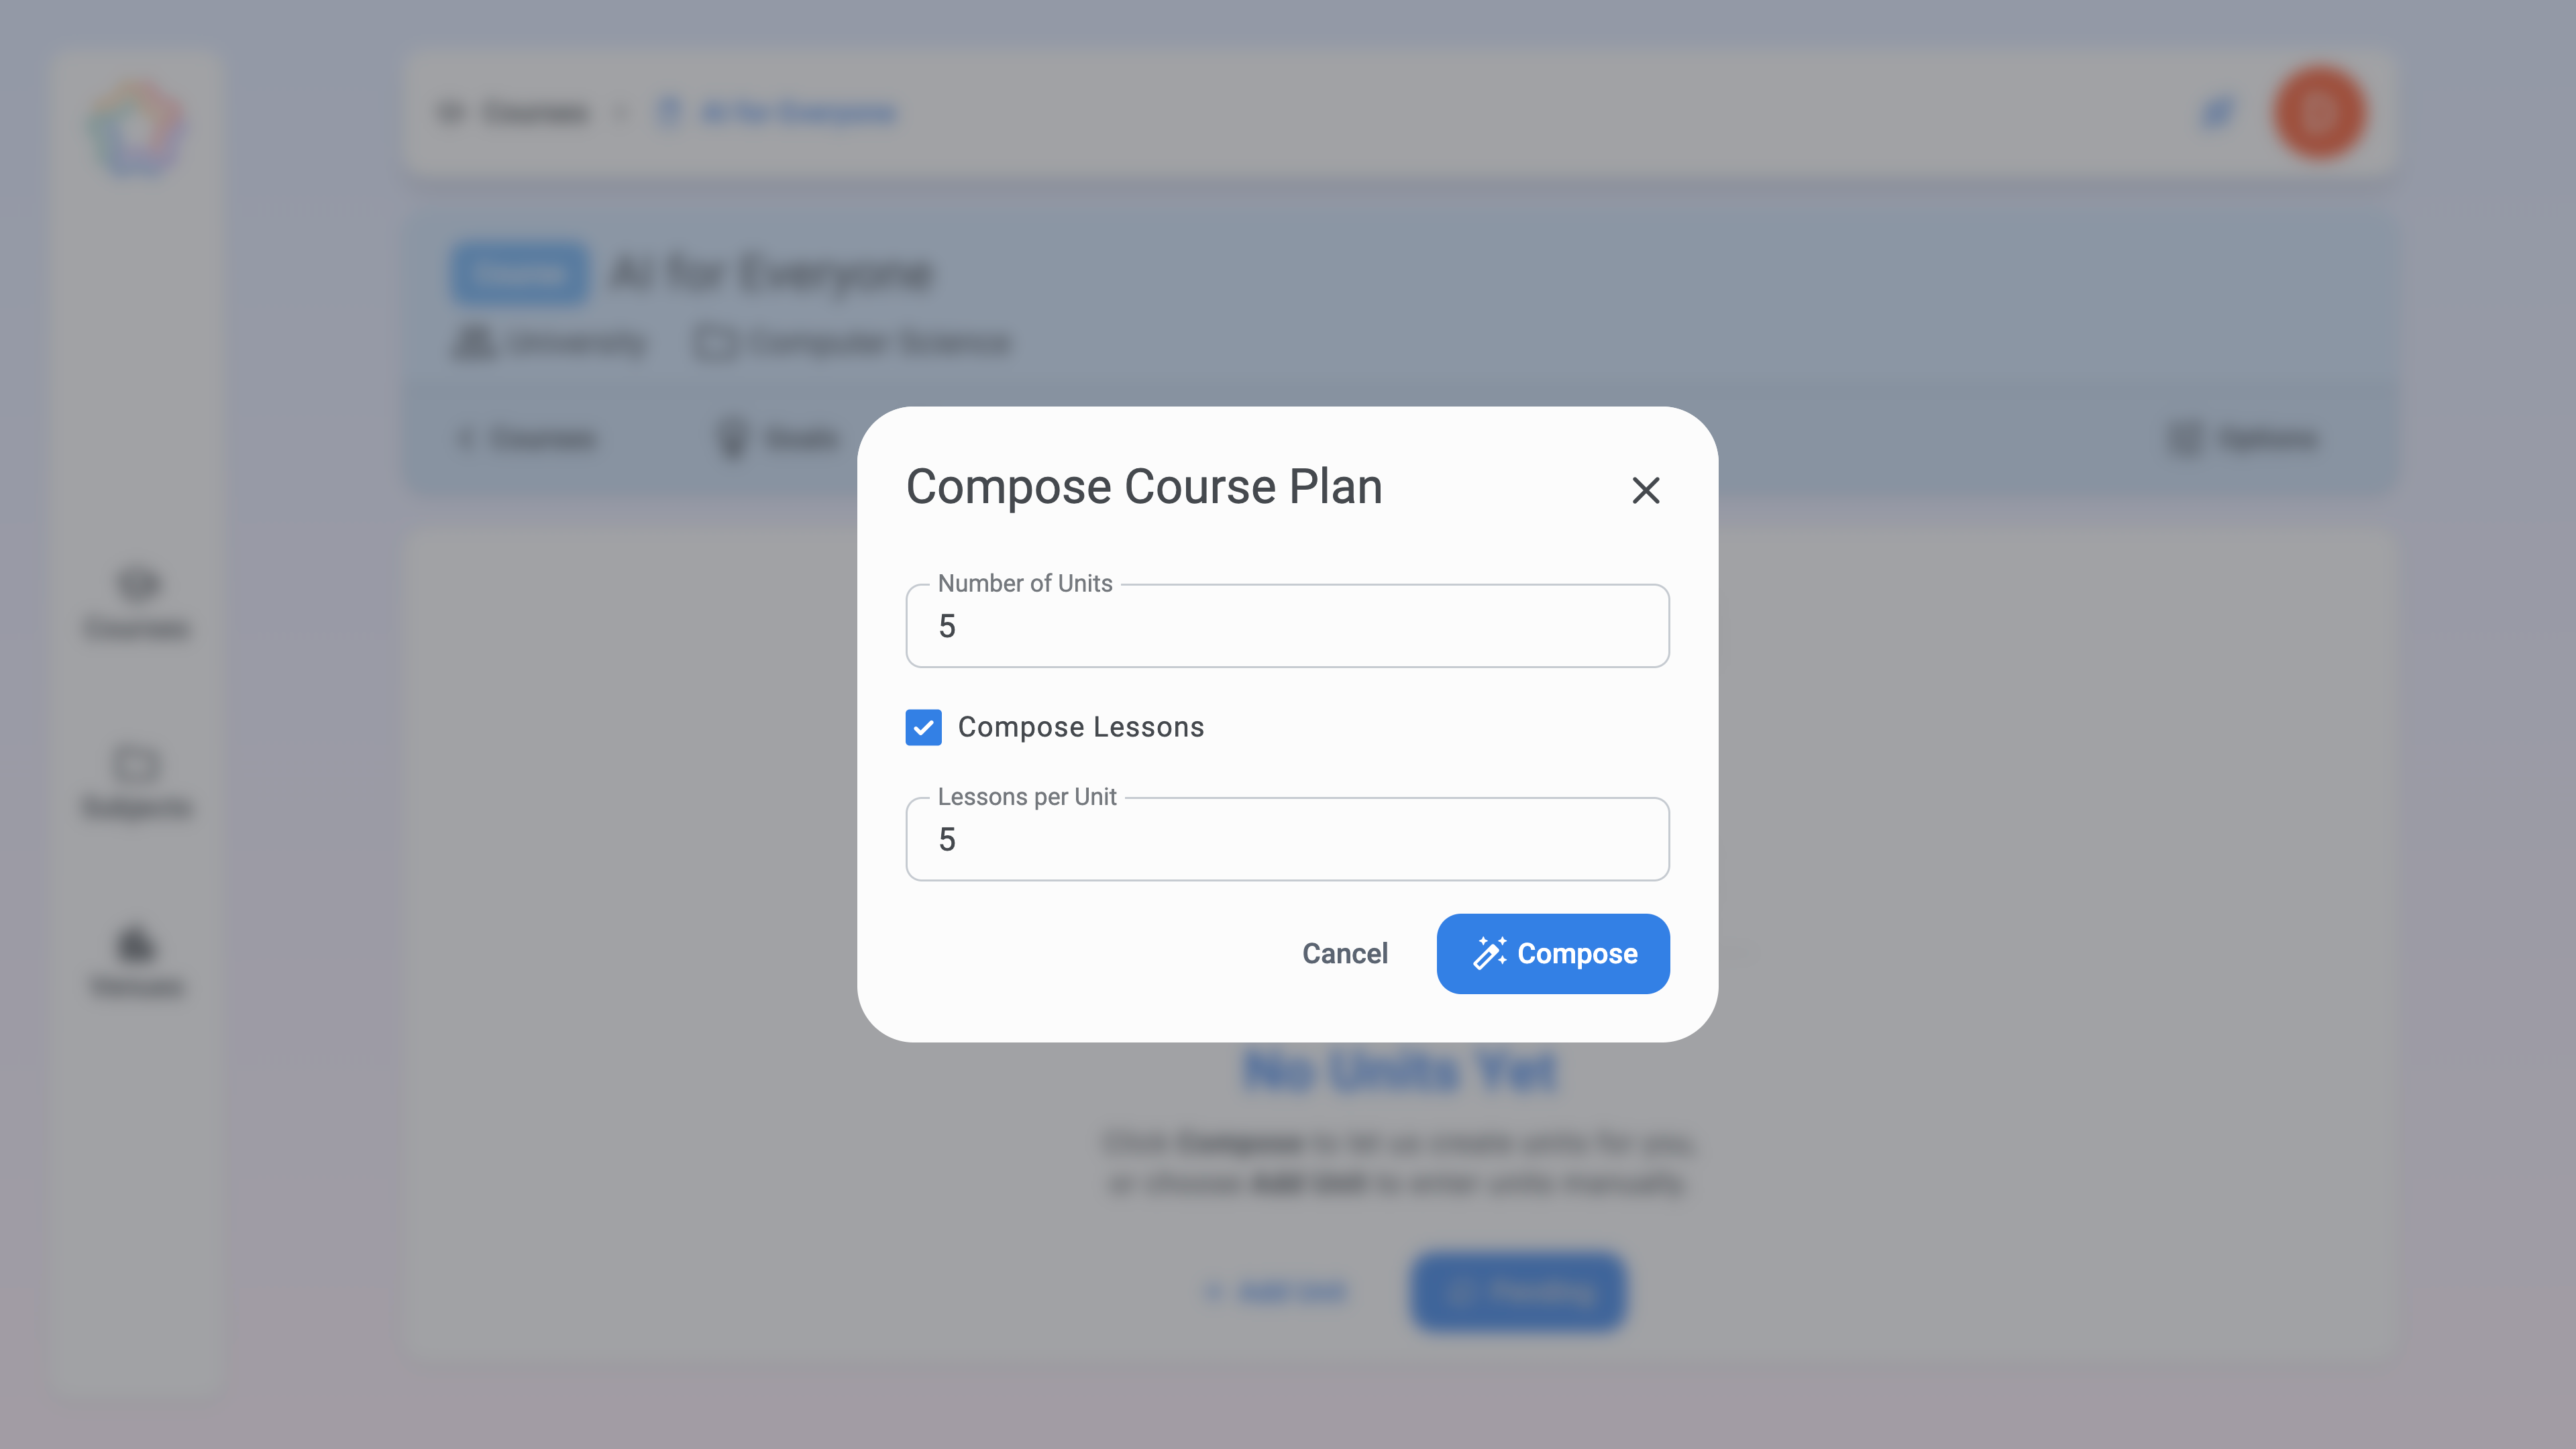
After configuring the settings, click the “Compose” button - units and lessons will be generated according to the settings, including their goals and objectives.
Add New Unit
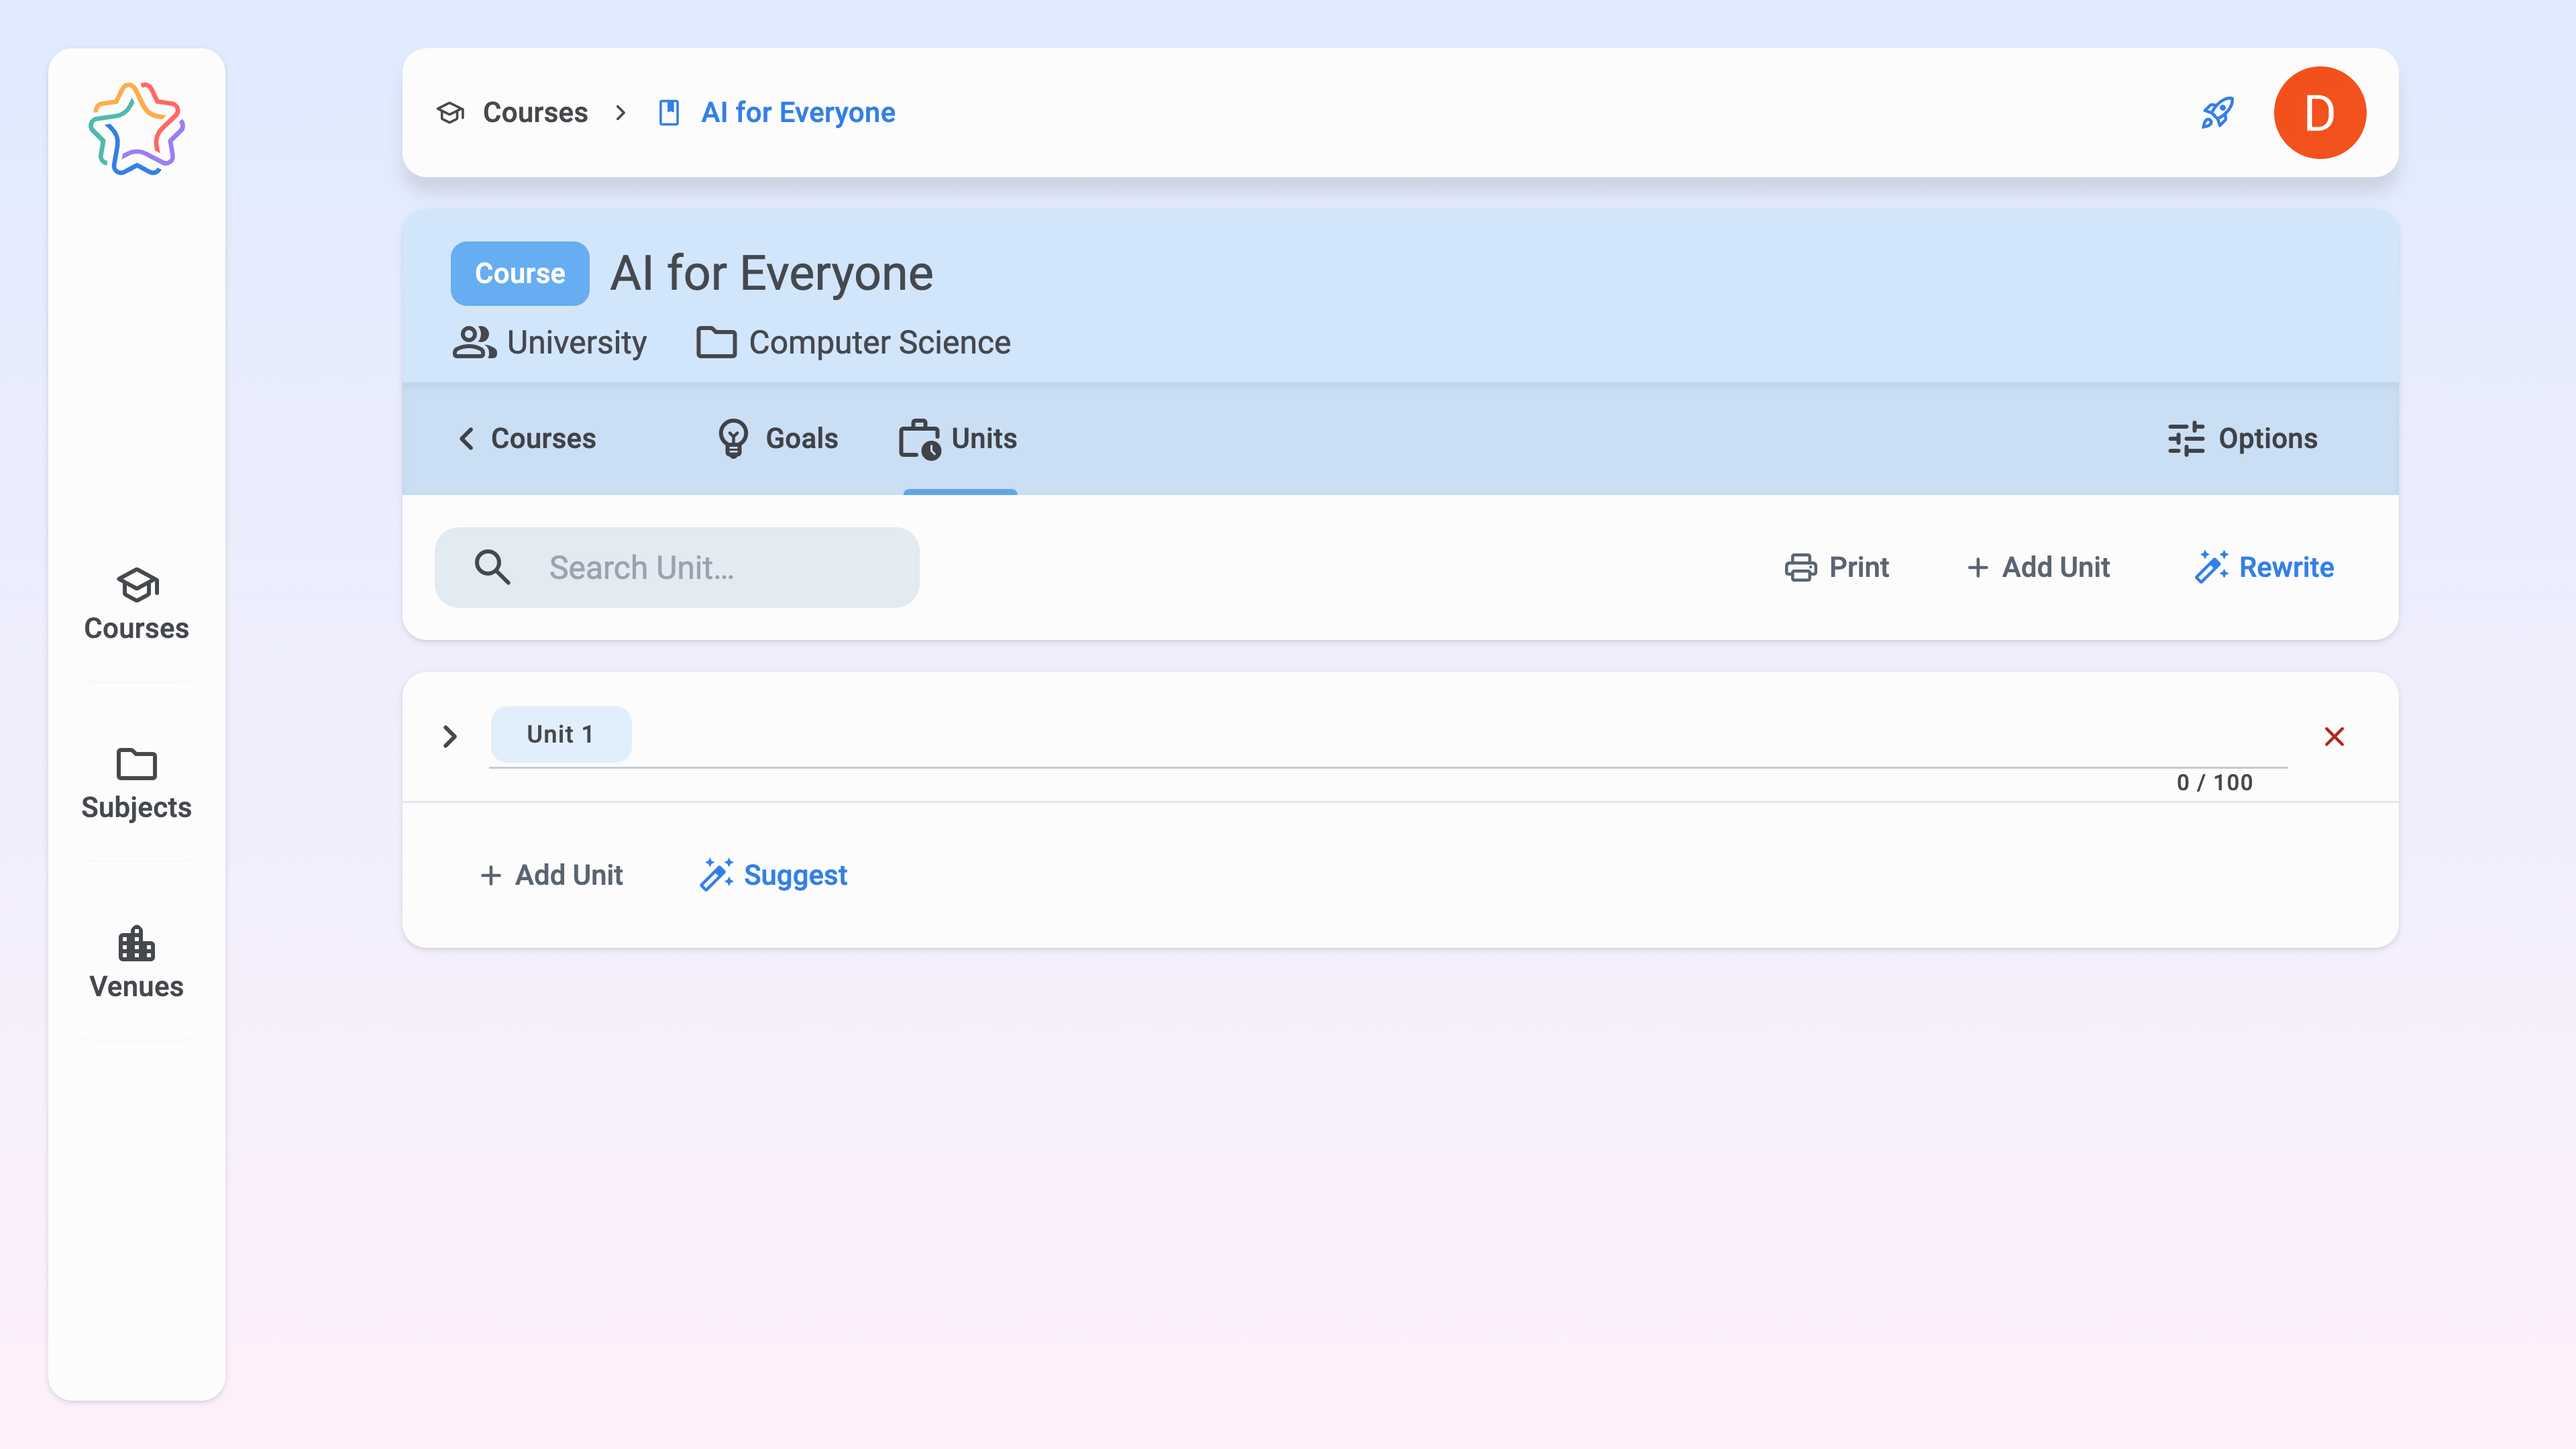
- Click the “Add Unit” button to add a new unit.
- This will open a field to enter a name for the unit.
- After entering the name, press Enter or click outside the box to save.
❗ Keep in mind
A manually created unit at this stage only contains a name. To add Goals and Objectives, you will need to go to separate pages or use the AI generation feature (this process is described next).
Step 2: Work with created Units and Lessons
Once units are created or generated, they are displayed on the page as expanded cards, where you can see all the important information:
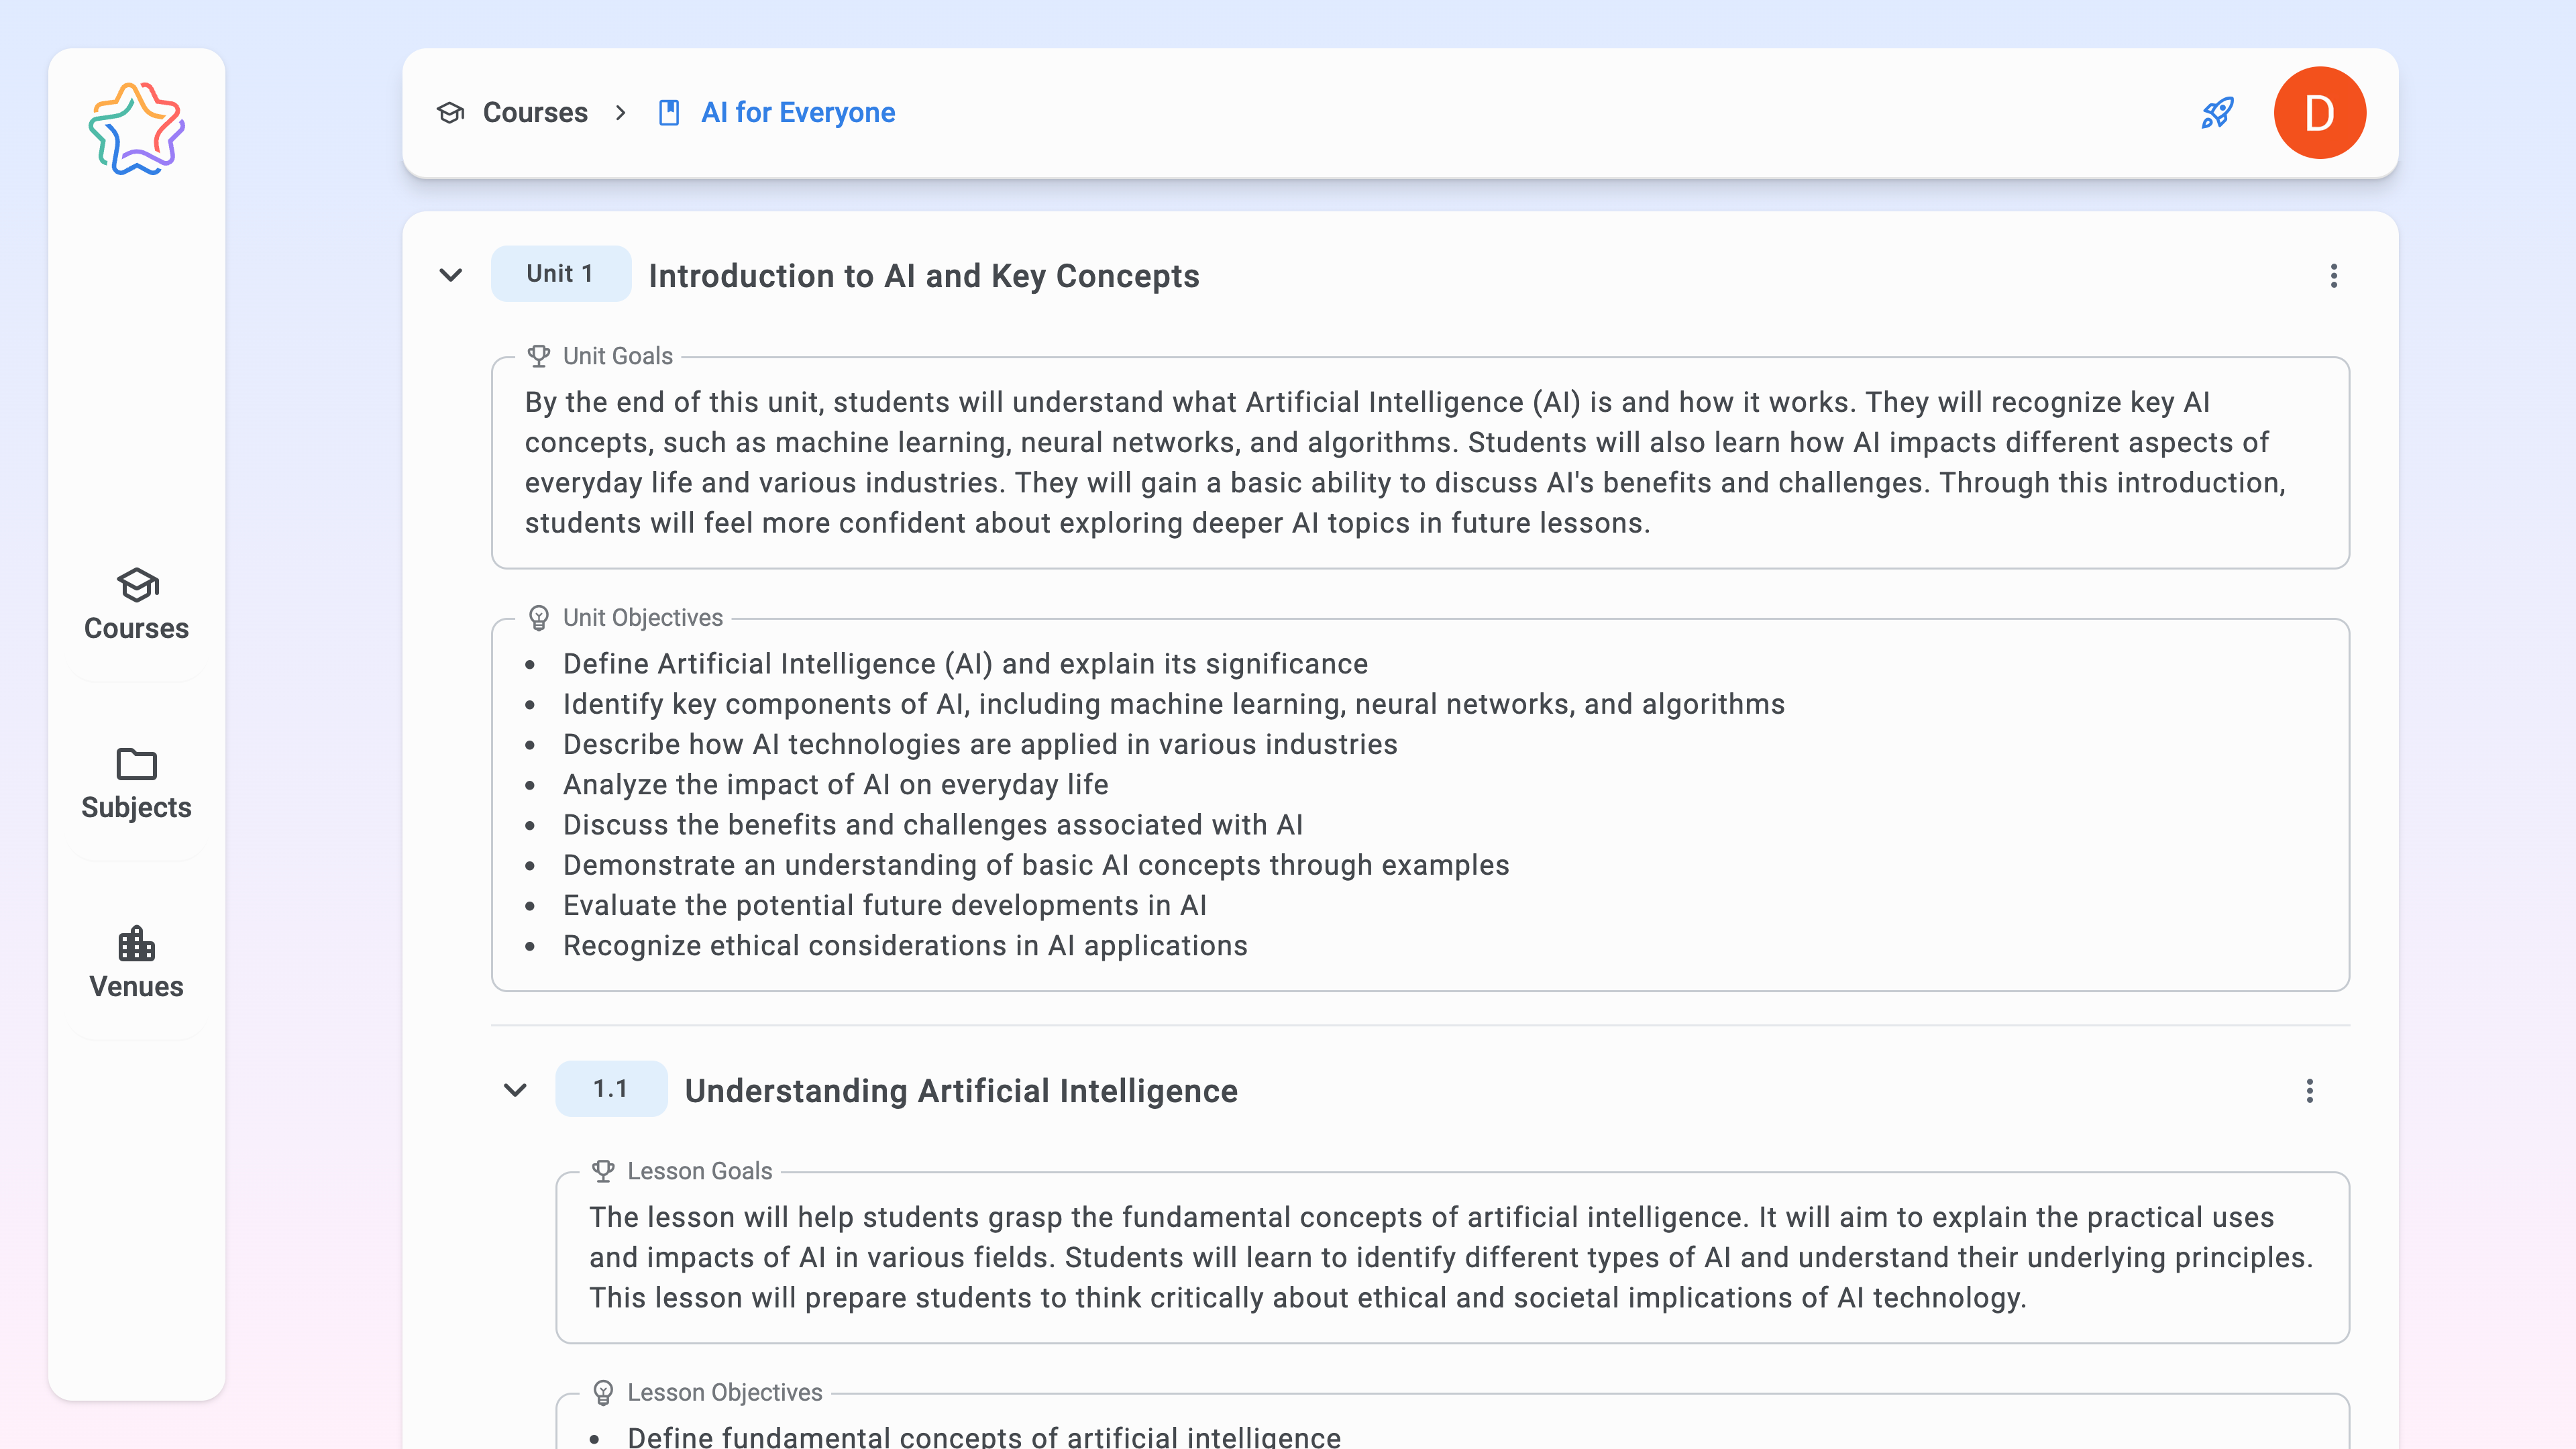
Unit Card Contents
- Unit Title: Displayed at the top of the card.
- Goals and Objectives: Below the unit title, you can see the goals and objectives that were either added manually or generated by the AI.
- Goals within a Unit: Within each unit, the lessons (if they have been created) are displayed, along with their titles, goals and objectives.
Editing Unit and Lesson titles
- To change the name of a unit or lesson, click on the pencil icon next to the name.
- Type the new name and press Enter or click outside the box to save.
Editing Goals and Objectives
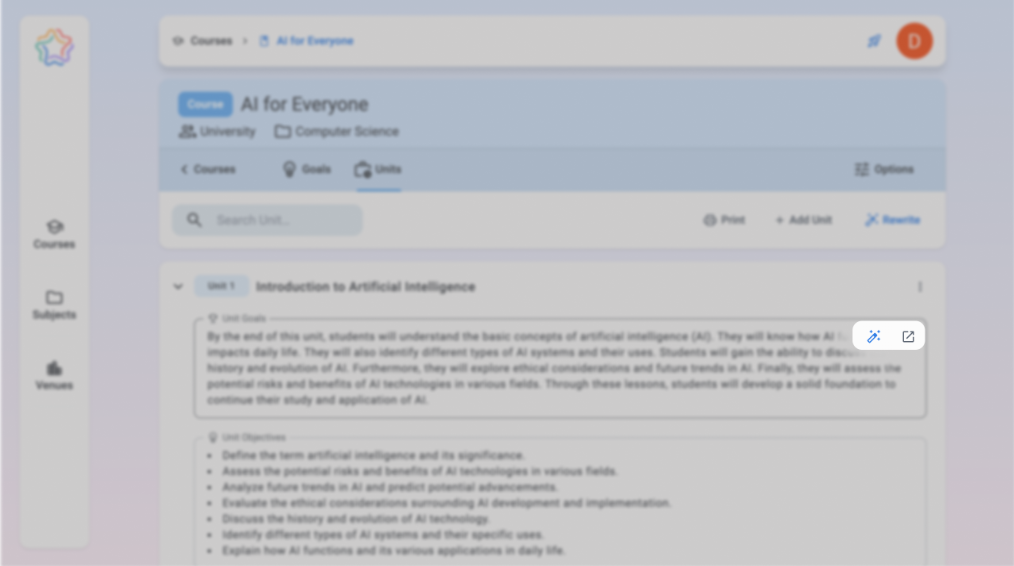
- The goals and objectives field includes a redirect button that will take you to separate pages for editing goals and objectives. (The button is displayed when you hover your mouse over the field).
- Direct editing of goals and objectives is not available on the Units page. However, AI-assisted content generation or regeneration buttons are available for each unit and lesson, allowing you to quickly create or update their content without leaving the current interface.
Deleting a Unit or Lesson
If you want to delete a unit or lesson, use the menu accessible via the three dots in the upper right corner of the card. Select the “Delete” option to remove the item from the course structure.
🔎 Note
Use the AI button to generate if you need to change the content of a goal or objective. This will keep the structure but update the text.
Step 3: Add New Unit
At the bottom of the page, two options are available for adding new unit:
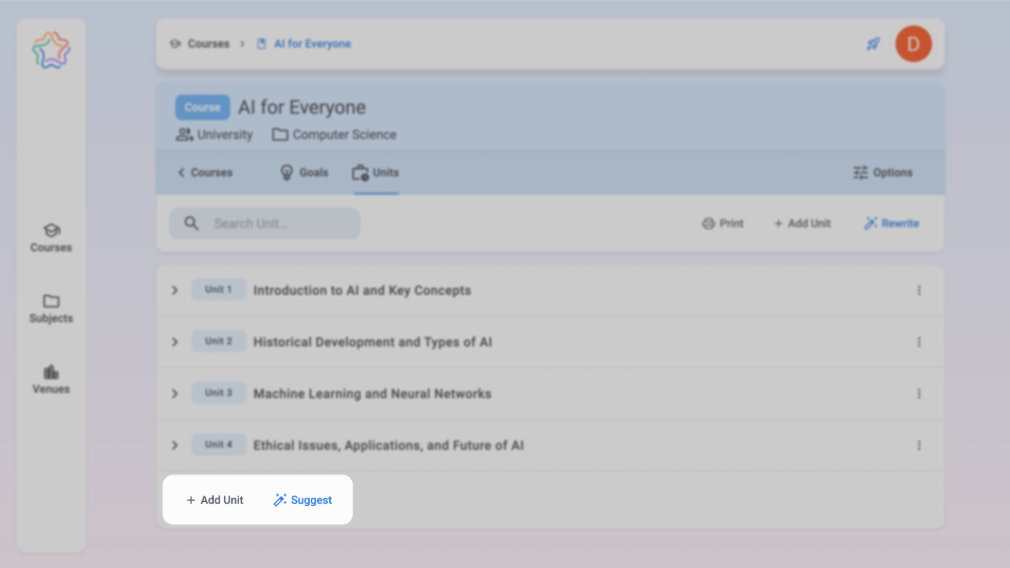
"Suggest" button
Allows you to automatically create a single unit with already defined goals and objectives, but no lessons. This creates a unit ready for further editing, which can be supplemented with lessons later.
"Add Unit" button:
This will open the unit's name field where you can enter the name of the unit. To fill in the goals and objectives fields, you must either go to the appropriate pages or use the generate function with AI.
💡 Useful tip
Using the "Suggest" button will help you quickly add new units to your course structure without having to manually enter goals and objectives and then detail them as needed.
Step 4: Manage Additional Unit Features
Additional buttons are available at the top of the page to help you manage units and update your course structure:
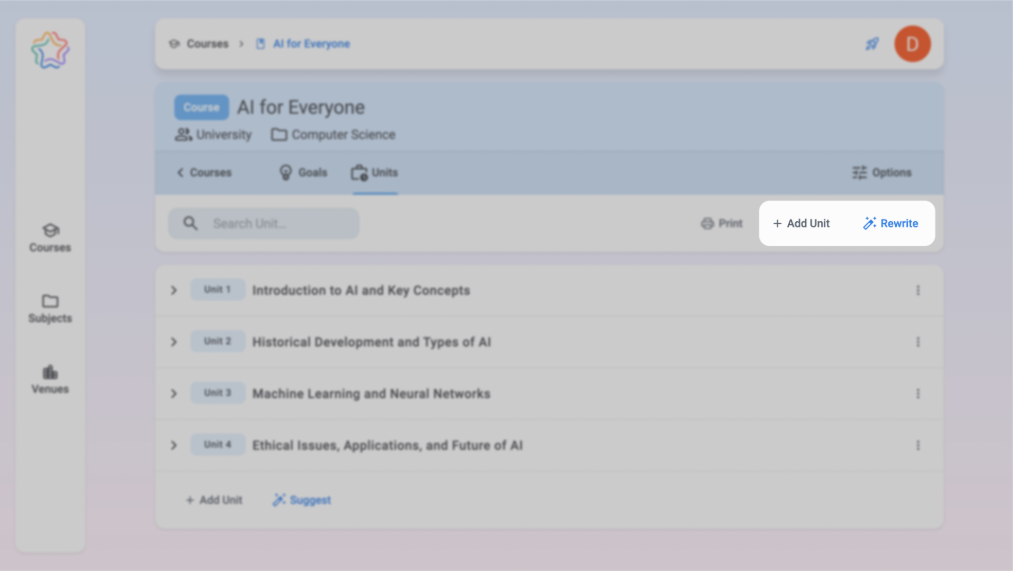
"Rewrite" button
- Click to open the settings where you can enter the number of units and lessons.
- You can then regenerate all course content based on the new settings, including goals and objectives.
"Add Unit" button
This button duplicates the functionality of the button at the bottom of the page and allows you to create a unit manually.
🔎 Note
The Rewrite feature is useful if you want to update the entire course, keeping the overall structure but refreshing the content.
Step 5: View Unit Cards: Open and Closed Views
For easy viewing and navigation of units and lessons, you can switch the display of cards between Open (shown as number 1 in the picture above) and Closed (shown as number 2 in the picture above) views by clicking the arrow to the left of the unit's or lesson's title:
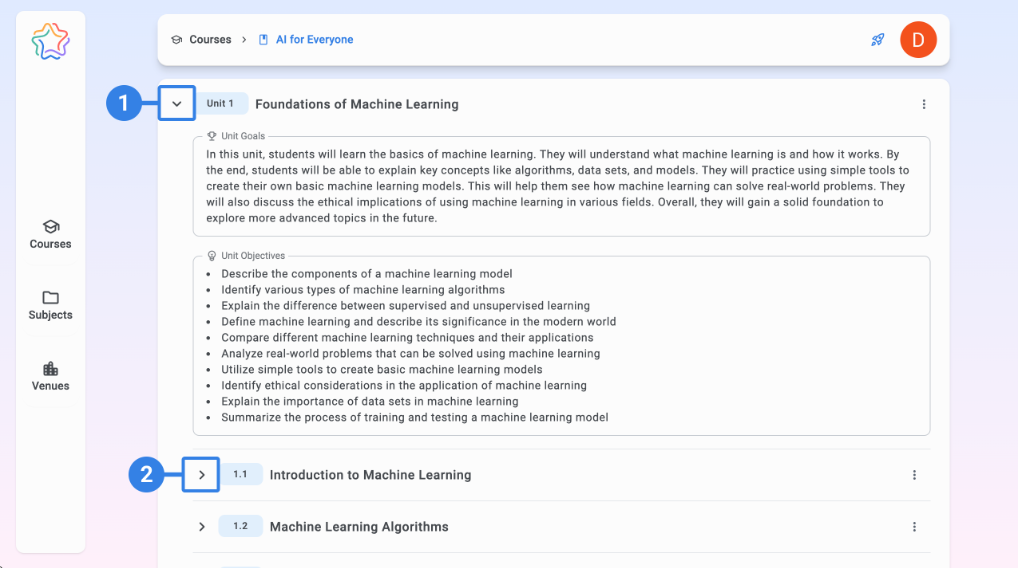
- Exposed cards: Shows all the details of the unit or lesson - goals, objectives and lessons. This is useful for detailed viewing and editing.
- Collapsed cards: Shows only the name of the unit or lesson, hiding the detailed content. This helps reduce screen space and is useful for an overview of the course structure.
Use the closed view for quick navigation, and the open view when you want to see the unit and lesson content in more detail.
Step 6: Change the order of the Units
On the Units page, a reorder function is available that allows you to change the unit sequence so that you can organize the course structure easily.
- Switch to closed view of cards: To use the reorder feature, units must be in closed view, displaying only their names. This helps keep things compact and makes it easier to navigate through the course.
- Reorder units: Hold a unit card and drag it to a new position in the list. This way, you can easily change the sequence of units to better structure the content.
💡 Useful tip
Using the drag-and-drop function is useful for quickly moving units around, especially if you want to adapt the order of the course depending on the complexity or logical sequence of topics.
Step 7: Preview and Print Units
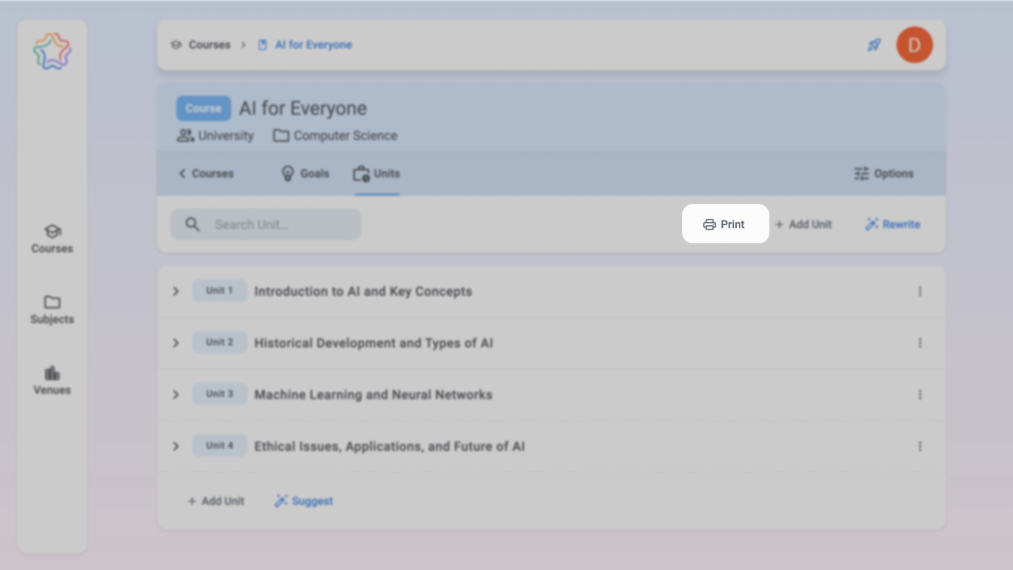
At the top of the page, you will find a Print button that allows you to view and print the created course units. This will allow you to save the document as a PDF or export it as a Word file (.doc/.docX) for easy editing, printing, or sharing.
💡 Tip
Use the Preview feature to ensure the content looks consistent and clear before sharing it with others. This is particularly useful for teachers or collaborators who prefer a physical copy of the course outline.
These steps will help you efficiently create, customize, and manage your course structure on the Units page. Use AI capabilities to generate content quickly if you want to speed up the process or add units and lessons manually if you have a clear idea of the course structure. You can easily update and edit information to create an effective and easy-to-learn curriculum.